
We eat with our eyes first, according to the folk proverb. We all know it is true, and we also know all the snap judgments we make when someone shows us a food photo that really doesn’t make the grade. “They don’t know how to take a picture,” we think. Or, “they aren’t professional enough to get good photography.” Or maybe the food really does taste that bland.
Today, when we need pictures to run on social media or on websites, we want to make sure our food looks great and that it stimulates the senses.
Read Also

Ground rules for farm family communications
Establishing meeting ground rules can help your family find ways to communicate that work for your farm. Here are some…
Now, Stratford food photographer, Terry Manzo can help. And she begins with this word of caution.
If you’re trying to take food photos and the photos you end up with really aren’t that good, then junk them. Don’t even consider using them, says Manzo. “Poorly photographed food is unappetizing,” she says. “It can undermine your intent to promote your product.”
Fortunately, with a bit of knowledge, effort and practice, your photos, even those taken with your phone, can be improved dramatically, says Manzo.
Below, Manzo and with Guelph, Ont. food blogger and cookbook author Charmian Christie share tips that everyone can use to take better food photos.
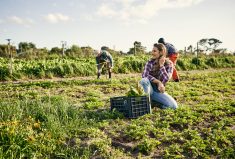
When you take a picture, you’re telling a visual story, says Manzo. Consumers are interested in where their food comes from, and farmers are in a unique position to tell that farm-to-table story, she says. Take pictures of the berries on the cane, take pictures of the fields, the tools, the fingers doing the work, the crop being harvested — the whole season.
You can use your creativity to present your farm in the most attractive way, continues Manzo. Instead of showing fruit in plastic baskets you can take it out and display it on a nice background. Some people don’t like to look at raw meat, but a picture of cooked beef presented in a beautiful way can be appealing.
Whenever possible, use natural light because it’s the most flattering for food. As practice for indoor pictures, Manzo suggests walking around with a piece of fruit on a plate and placing it near different windows to determine which gives the best light, noting that this will vary at different times of the day.
Put the subject on a table right next to the window and turn off overhead lights as these can result in strange colours in the photo, says Manzo. If the natural light is too bright, which can result in harsh shadows, a diffuser (from a photography store) or a sheer curtain can be used.
When taking pictures outdoors, overcast days, early morning or evening light, and shade are the best for taking photos. “Noon on a sunny day is the worst,” says Manzo.

Also remember the power of composition. In general, photos are more appealing to the eye if the subject is not in the centre of the photo. Photographers refer to the Rule of Thirds, picturing two vertical and two horizontal lines dividing the frame into nine boxes which make it easier to offset the subject.
Christie has been doing food photography for about 10 years since she first began blogging. Although she cringes at her earliest pictures, she persisted in improving her craft by taking courses, reading photography books and following the work of favourite food photographers. Plus, she did lots and lots of practice, and her photos improved.
Today, Christie says that the most important lesson she learned was to learn to slow down. She recommends taking many shots from many angles using different camera orientations (vertical or horizontal) to see what works and what doesn’t.
While you can make a lot of improvements to photos using editing software such as Lightroom or Photoshop, Christie’s advice is to try to take good photos that require minimal processing, thus saving time in the long run. And only keep the best photos as they can eat up a lot of storage memory on your phone or computer, adds Christie.
Before you take any pictures, it’s worth thinking about the story you are trying to tell, which is “your brand.” Known as “The Messy Baker” (also the title of her first cookbook), Christie will sometimes show the batch of cookies she burned because her brand is “approachable, you can do it too.”
One of the mistakes Christie made in the early days was to try to create pretty scenes using dishes with patterns and lots of props such as silverware, napkins and glasses. However, she realized this confused the viewer and now she tips towards simpler layouts. “The focus should be on the food.”
Joan Craig of Arthur, Ont., who takes pictures of their farm’s direct-marketed beef for social media, was a participant in Manzo’s Stratford workshop. One of her take-aways from the day was the importance of taking photos from all sides to see the impact of the light as well as at angles varying from top-down through various side-view angles.
Top-down is popular for food photography and can be good when you don’t want the background to show, says Manzo, who has been known to put the food on the floor to get a really good top-down picture. On the other hand, a “fork-eye” side view is nice for piles of cookies or squares, she says.
Woodstock, Ont. berry grower Sue Hilborn attended one of Manzo’s food photography workshops at the Stratford Chefs School. Hilborn likes to take pictures for social media and got immediate results after taking Manzo’s workshop.
At the workshop, Hilborn also learned about the Snap Seed app for her smartphone which allows you to edit your pictures right on your phone. “It’s amazing,” she says. The “tune image” feature can be used to adjust brightness, contrast, white balance, etc.
Says Hilborn: “The quality of the pictures makes them look more professional and encourages people (potential customers) to take a second look.”
Photo TIPS for food
Start by looking through cookbooks and foodie Instagram feeds, says professional food photographer Terry Manzo. Determine what you like or don’t like about particular photos.
Manzo warns all her students to check photos for distractions that you don’t want in your photos such as parked cars or telephone poles in the background, or bright lights in the corner.
Before taking a photo, consider how it will be used. If it will be displayed on a computer screen, a horizontal orientation is best. Horizontal also tends to work better for Instagram photos, which are displayed square.
Cookbook photographer Charmian Christie “haunted” discount home furnishing stores for dishes and other props. She prefers smaller and shallower dishes in neutral tones and groupings of odd numbers of items.
“Three works well,” she says.
Darker coloured dishes and backgrounds in black, blue or brown, with a matte finish to reduce the amount of reflection from the light, can be used if you are trying to create dark and moody food photography, says Manzo.
You can get creative with the surface your food is resting on. Slate tiles, rustic wooden boards, craft paper, even well-used cookie sheets can be used, says Manzo.
Glare from utensils can be a problem so Christie purchased silver utensils from thrift stores that have a dull patina.
When taking pictures of food that won’t look good for very long, such as ice cream that melts, Manzo suggests using a stand-in dish while you check the light, the props and the best camera angles. When you are ready, you can sub-in the actual dish. Remember to add garnishes at the last minute to avoid wilting.
Something being poured or shaken, hands holding the food, or wayward crumbs can add interest to photos, says Manzo.
Then remember, says Manzo, photography rules are only a guideline.
Resources