Checking all the parts showed a leak repair needed more than a new gasket

I’m always reminded of that famous Forrest Gump saying when working on an older machine or vehicle. Opening up a component like a transmission or transfer case, or looking behind the dashboard, is like opening a box of chocolates. You never know what you’ll find.
The latest repair job to come into the Grainews Garage certainly provided some unexpected finds. Initially, the objective was simple: replace a leaky gasket. But this repair demonstrated the importance of giving everything a careful inspection. Doing that in this case showed there was much more to do than drop in a new gasket to take care of this leak. Here's how the repair went.
1. Leaking
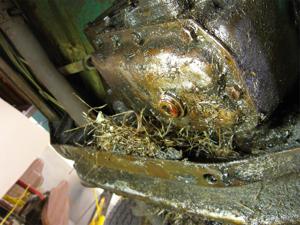
The oil pan on the transfer case of this older four-wheel drive vehicle had more leaks than the Trump Whitehouse. Sometimes pinpointing the exact location of a leak on a machine can be easier said than done. In this case the source was obvious. But if it wasn’t, it would have been necessary to clean all the oil off the underside of the components and run the machine until it gets up to operating temperature, while looking for new drips to appear.
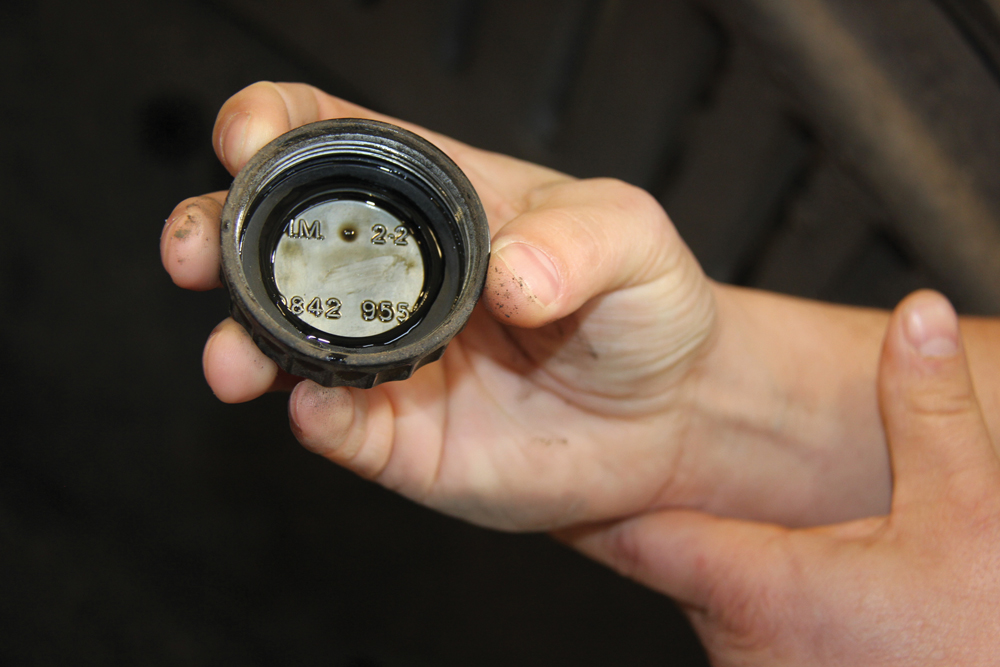
Checking the fluid level inside the transfer case of this vehicle revealed it was low, and the red colour suggested someone had previously filled it with automatic transmission fluid (ATF) rather than the required, and much thicker, 80W90 gear lube. So aside from wanting to get rid of the annoying oil puddles left underneath the vehicle when it was parked and the need for refills to keep the fluid level up, it was necessary to drain out the ATF and replace it with the proper lubricant.
After removing a steel skid plate below the transfer case, access to the oil pan was pretty good. With the fluid drained and a few bolts unscrewed, it came off.
2. Scrapes
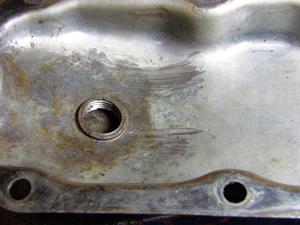
Once the pan was off, we noticed the small bit of fluid left inside was heavily contaminated with a lot of glittery metal particles, which is a bad sign suggesting something inside the transfer case was wearing fast. At first, we suspected the particles were from a gear or a bearing surface.
On close inspection, it appeared the pan was damaged. Scrapes in the pan near the drain plug revealed a gear had been digging into it. Something had deformed the pan, denting it and pushing the surface up and into interference with the gear.
An inspection of the visible gears and surfaces inside the transfer case showed everything else looked okay, so we were satisfied the particles likely came from the grooves in the oil pan.
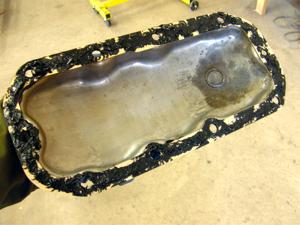
3. Gaps
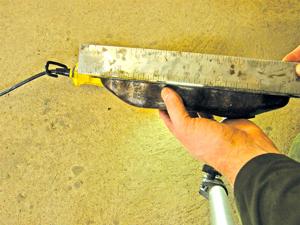
The old pan gasket was thoroughly soaked and hadn’t been sealing the joint. To find out why, we checked the pan’s mating surface. That showed another major problem. Someone — maybe the guy who put the ATF in it — had severely over torqued the bolts and deformed the pan mating surface. There was no indication any gasket sealant had been applied, and the gaps were too large for the gasket to make a seal.
In the image, a straight edge is held against the pan’s mating surface with a shop light behind it. The light shining through the gaps between the mating surface and straight edge shows how severely the pan is deformed.
4. Hammer
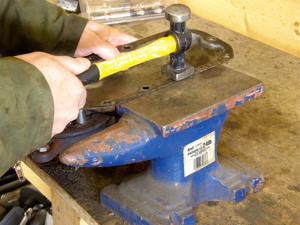
Ideally, we’d have preferred to replace the pan with one in better condition. But in true Grainews style, we did the best we could with the parts on hand. Using a body hammer and a small anvil, the mating surfaces were pounded straight. Use light hammer blows for jobs like this, because the metal is relatively thin and moves easily. There’s not need to bash it. After every few blows, the pan was rechecked against a straight edge until it was as good and straight as we could get it.
Next, we turned our attention to the area around the drain plug where the gear was rubbing. Using the rounded face on the opposite side of this same hammer, the dent was pounded out and the pan’s original shape was regained to provide adequate clearance for the gear. Again, just using light hammer blows and rechecking the progress frequently until the job was done
.
5. Sandpaper

Before being reattached, the mating surfaces need to be clean, dry and free of any contaminants. The pan spent some time in a parts washer and was given another rub down with parts cleaner. Lastly, some 220-grit sandpaper was used to remove any gasket fragments or old sealant and lightly scuff the surface. This was done on the transfer case surface as well.
6. Painting
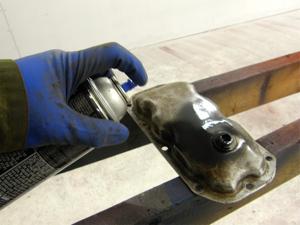
Of course, no one is likely to ever see this part, unless we run over a gopher and he looks up. But thoroughly cleaning the pan and giving it a quick spray of rattle-can paint will protect the metal, and it will help give the repair a complete and professional touch.
7. Gasket
Because we weren’t able to hammer the pan mating surfaces perfectly flat, we’re going to apply a coat of gasket sealant to both sides of the new gasket. That will help compensate for the slightly uneven surface and create a seal. (We finished evening out the sealant just after this photo was taken.)
The pan was then bolted back onto the transfer case, but only tight enough to get the sealant to start oozing out of the edges. After about an hour, the sealant will set up. Then the bolts can get a final tightening, which requires only about a half turn, just enough to snug them up. Remember, excessive torque deformed the metal edges of the pan and caused the leak problem in the first place. We don’t want to end up doing exactly the same thing again.
8. Finished
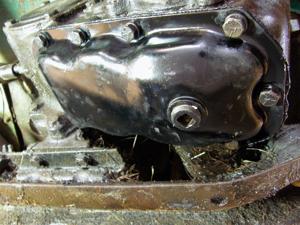
With the pan back in place, the bolts torqued and the transfer case filled with 80W90 gear lube, the gasket and sealant have worked to create a good seal. The joint is completely dry. We also wrapped the drain plug threads with Teflon tape to ensure it doesn’t leak either.
Once the skid plate was reinstalled, the job was finished.
During a road test after the repair, we noticed the odd, grinding noise coming from under the floorboards that had been annoying — and worrying — before we made the repair was now gone. Repairing the damaged oil pan cured the leak and the interference with the drive gear. Everything hums nicely now.
Scott Garvey is the machinery editor for Grainews. Contact him at [email protected].